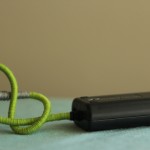
(I wrapped more or less all of the cords I own. In one day. I wouldn’t recommend doing it all in one day- it hurts your hands to do more than a couple cords at a time!)
Time: 30 minutes – 2 hours+ per cord. Short cords under 2 feet take about a half hour. Longer cords or cords like computer power cords take quite a bit longer since they are harder to wrap due to heavier parts.
Supplies:
- Several skeins of embroidery floss- leftovers work perfectly, as long as they all have the same number of strands. You will need the equivalent of 2-3 full skeins of floss for most cords. Yarn will also work, but embroidery floss worked best for me since it is all the same thickness.
- As small a needle as you can find that you can still thread the embroidery floss through the eye
- Small floss folders or something to wrap the embroidery floss on to- optional, but helpful to prevent tangling
- Binder clips, twisty ties, or anything else that will help keep the cords from tangling as you work.
Cords:
My favorite ones to wrap are 3-4 foot long USB cables- they take between 30 minutes to an hour to cover. Most headphone cords aren’t suitable- they are too thin to look nice (covering them in knit icord is a much better option- you get a pattern for this when you sign up for my newsletter). I successfully covered everything from HDMI cables to headsets (my dictation headset has a much thicker cable than most headphones or earbuds), cables for my phone, tablet, kindle, keyboard, camera battery charger…and a handful of others.
Select the cord and embroidery thread you are going to use. Hold an a half to 1 inch of the floss down along the edge of the cord so you can secure the end. Start wrapping tightly, being sure to cover the floss end as you work. Don’t tie knots.
When you switch colors you want to be careful that you are wrapping the new color as close as possible to the old color. I like to alternate 2 colors, carrying the strand of embroidery floss I am not working with next to my cord. You want as few ends as possible that can come unravelled.
I limited the number of colors I had going at any time to 2- enough to make for lots of short fun stripes, but any more strands effected the thickness of the cord, making some sections appear to bulge.
Binder clips and twisty ties help hold the cord in place while working…
…and are also useful when you have to set your work down.
When you are nearing the end be especially vigilant that you are wrapping tightly- you will tug on the ends of the wrapped cords the most, and you want to be sure the embroidery floss is wound tight enough that tugging won’t cause it to unravel. When you reach the end cut a the floss 6-8 inches and thread it on to the needle. Going under just a few strands at a time, weave the floss under the wound floss for at least a half inch- one inch is better. Don’t knot the threads- you want the end to be as seamless as possible. If you are worried about it unraveling, a few drops of glue will help hold it in place.


