• Skip to main content
  • Skip to footer

Midnightsky Fibers

Patterns for Your Knitting Adventures

  • Hats
  • Mittens & Wrist Warmers
  • Shawls & Scarves
  • All Knitting Patterns
    • Baby
    • Mittens & Wrist Warmers
    • Hats
    • Home & Accessories
    • Shawls & Scarves
    • Sweaters & Vests

Blog

Pink Lotus

louts pink thermal knit hat (2)

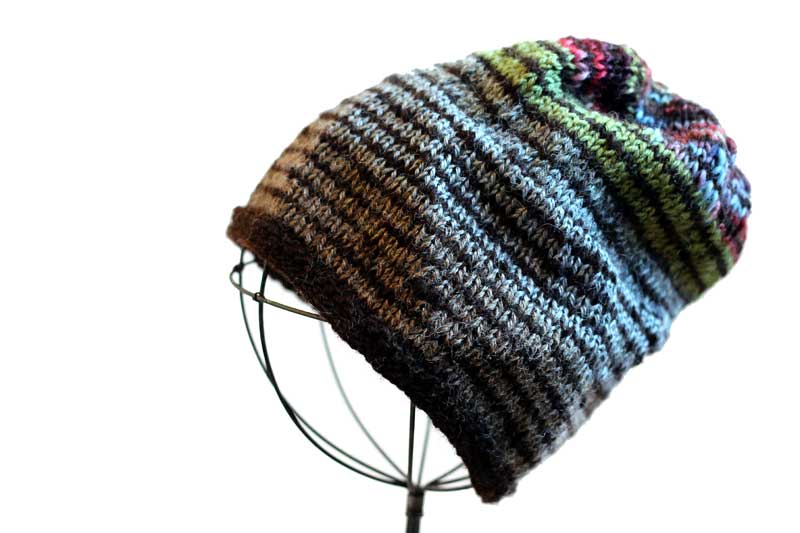
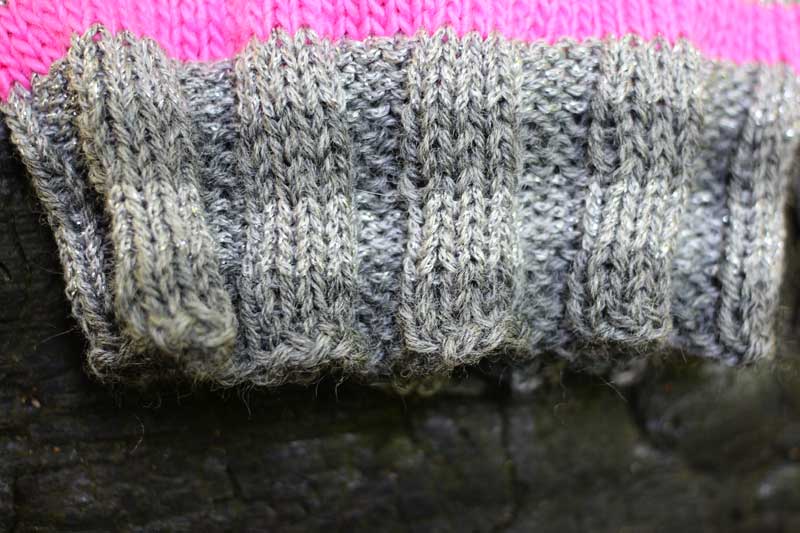
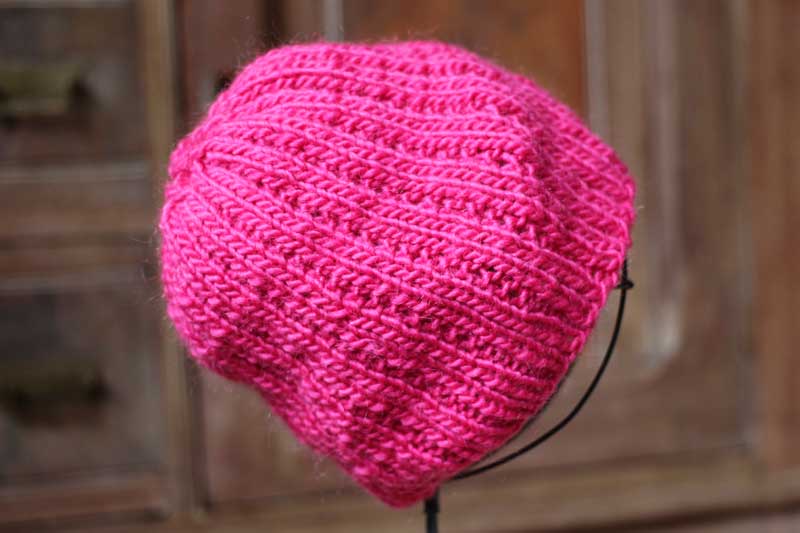
A thermal inspired rib pattern keeps this hat nice and stretchy, while not being as fitted as a regular ribbed hat. I knit a ribbed brim for about an inch before switching to the pattern to make sure the brim would draw in enough to keep the hat securely on the head.  Knit in some Lamb’s Pride Worsted in Lotus Pink that I thrifted, I am not sure I would have chosen the color otherwise- but it did make for a very cheerful hat!

louts pink thermal knit hat (1)

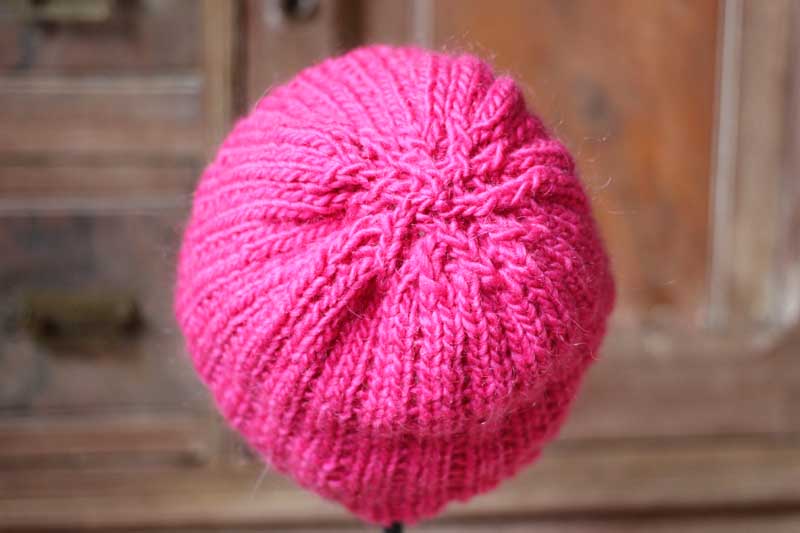
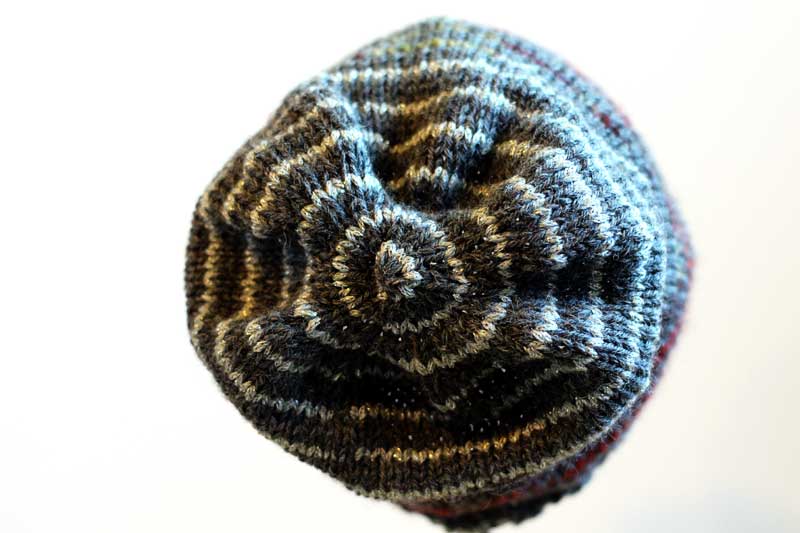
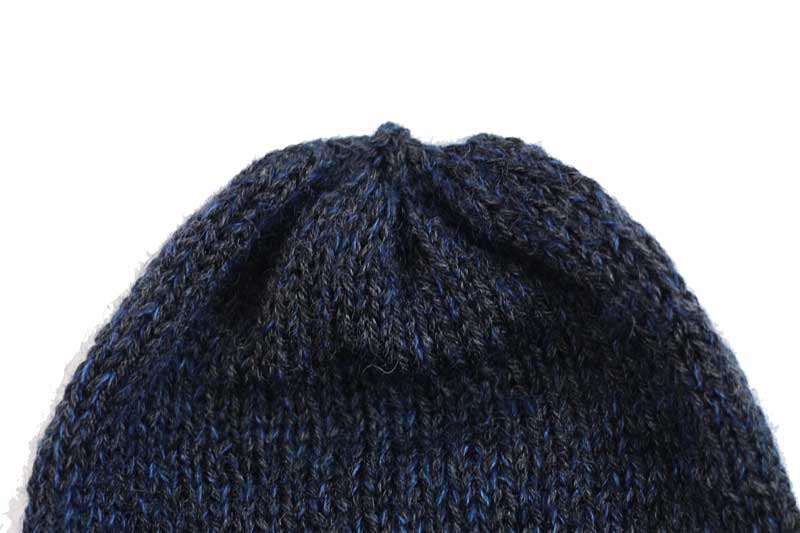
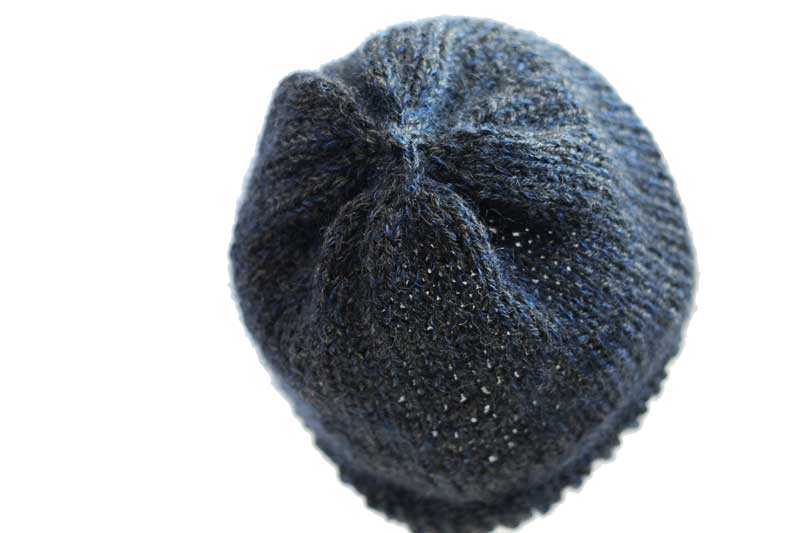
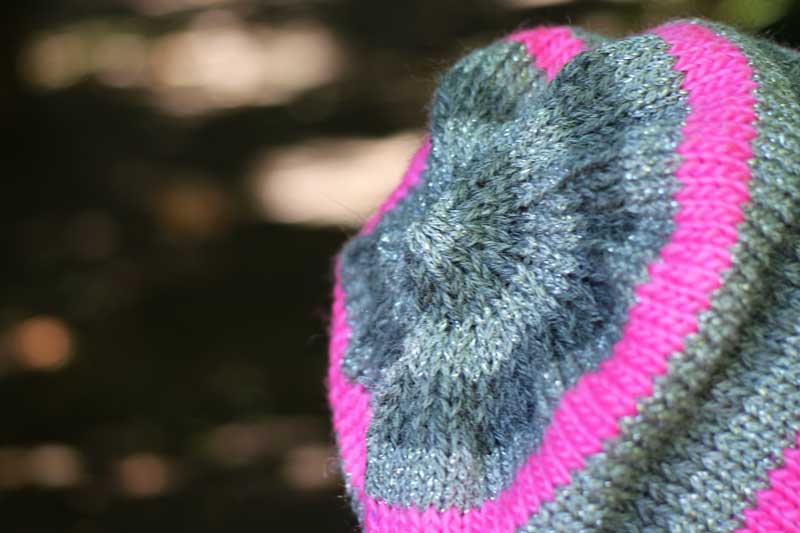
The decreases at the top of the hat are a great example of why it is generally best to work several rounds between rapid decrease rounds to prevent stitches from pulling out. This will be less noticeable after blocking.

Filed Under: Haturday - Knit Hats

Metallic Gray Hats

metallic gray striped hat1 (3)

I knit these two gray striped hats to use up a pile of worsted weight leftovers-, a bit of Manos, a bit of metallic, a bit of tapestry wool in a funky green color, and some leftover beige and grays (some silk and alpaca blended in there!). To tie the yarns together I used solid color stripes.

metallic gray striped hat1 (1)

The first hat I knit a huge chunk of the body in being and gray stripes, switching to a bright green and then the Manos to stripe the top. The main color of the hat is a brown wool I thrifted- it’s not super soft, but it is a fantastic deep brown color that really makes the silver and greens pop.

metallic knit gray hat 2

The second hat I knit to use up a large chunk of the metallic yarn and all the remaining Manos. I knit the hem in metallic stripes, then switched to the body until I ran out, switching back to the metallic to finish off the hat. Since I didn’t have much of either yarn left (I like a challenge!), I knit 3 rounds in between single rounds of the contrasting color.

Filed Under: Haturday - Knit Hats

Midnight Express Hat Top Tutorial

wool, mohair, and silk knit beanie

Midnight Express Hat Top

This is the hat top you make when you realize you have knit around and around (and around) and are about to run out of yarn. Or when you want a hat with a scrunched up top typical of many slouchy hats without having to break yarn and pull through 20+ stitches (the downside of which is often a hole that widens as the hat is worn).

Set Up: Finish knitting the body of you hat. You want the hat to be as long as you need for it to fit your head- or a bit more if you want it to be slouchy, since the decreases add only a couple rounds. I try the hat on and scrunch it on top of my head- if I can scrunch the top all the way closed, I am ready to start decreasing.

midnight express hat (3)

To work the top: Knit 2 stitches together around and around, every round. No need to place a marker, just work around until you are out of stitches. Try and keep an even tension as you do this (especially at the edges of needles), to avoid stretching out the decreases.

  • Flat top: Stop when you have 6-8 stitches left if you want a “flat” top without a slight point at the top, break yarn, pull through remaining stitches. This is best if you need a flat top for attaching a pom pom to.
  • Pointy tip top: Knit 2 together around until you have 2 stitches left. Pull the last stitch over the first, break yarn, pull through last stitch. This forms a teeny tiny pointy tip at the top.
midnight express hat rapid decrease
I made this picture a bit washed out so you can see the details a bit better- check out the halo from the mohair!

Good for:

  • Stretchy, slouchy hats with a casual look.
  • Stockinette, reverse stockinette stitch, or very simple patterns that won’t be distorted by the rapid decreasing.
  • DK, worsted weight, or larger yarns where all the stitches can be decreased in just a few rounds.
  • Wool and wool blend yarns with lots of stretch- they won’t look as distorted by the rapid decreasing.
  • When you want to finish a hat quickly- no stitch marker or remembering how many rounds to knit between decrease rounds.

Not great for:

  • Sock weight or smaller yarns- anything that takes more than a few rounds tends to look sloppy and stretched out. Better to add a few knit rounds between decrease rounds.
  • Inelastic yarns- yarns that are mostly cotton, silky, or other fibers without much stretch won’t look at neat at the top.

midnight express hat (5)

Variation:

I usually work a variation of this top, with several knit rounds between each round of decreases. This still has a scrunched top, but stitches do not look pulled out, and it is easier to continue decreasing in a particular stitch pattern.

beanie with ribbing

I knit this hat in a dark gray wool with a strand of mohair and silk held along for a bit of fuzz and shine. I sized up a needle from my usual gauge to really let the mohair shine through. A couple inches of 1×1 ribbing for the brim (being lazy and not switching to a smaller needle, since I didn’t have one with me- notice how it poofs) and straight st st for the body made this a quick and easy knit- which is just what I needed for a weekend project while waiting for fireworks at a festival.

Filed Under: Haturday - Knit Hats, Tutorials

Cashmere Tweed Redux

Cashmere Tweed Striped Hat (2)

Knit with the leftovers from the Tweedy Cashmere Hat combined with some neutral gray and gray/beige wools, this was a very simple but fun beanie to knit! It’s not as soft as its predecessor, due to the wool, but there is more stretch to the hat.

Cashmere Tweed Striped Hat (1)

Thin 2 round stripes contrast nicely with the solid color ribbed hem. I do wish I had made the hem a wee bit longer so the cashmere totally covered the ears, but then I suppose I probably wouldn’t have had enough yarn to finish the hat in stripes!

Cashmere Tweed Striped Hat (3) Cashmere Tweed Striped Hat (4)

Filed Under: Haturday - Knit Hats

Wrapped Cords: Embroidery Floss Covered Electric Cords

(I  wrapped more or less all of the cords I own. In one day. I wouldn’t recommend doing it all in one day- it hurts your hands to do more than a couple cords at a time!)

Time: 30 minutes – 2 hours+ per cord. Short cords under 2 feet take about a half hour. Longer cords or cords like computer power cords take quite a bit longer since they are harder to wrap due to heavier parts.

Supplies:

  • Several skeins of embroidery floss- leftovers work perfectly, as long as they all have the same number of strands. You will need the equivalent of 2-3 full skeins of floss for most cords. Yarn will also work, but embroidery floss worked best for me since it is all the same thickness.
  • As small a needle as you can find that you can still thread the embroidery floss through the eye
  • Small floss folders or something to wrap the embroidery floss on to- optional, but helpful to prevent tangling
  • Binder clips, twisty ties, or anything else that will help keep the cords from tangling as you work.

Cords:

My favorite ones to wrap are 3-4 foot long USB cables- they take between 30 minutes to an hour to cover. Most headphone cords aren’t suitable- they are too thin to look nice (covering them in knit icord is a much better option- you get a pattern for this when you sign up for my newsletter). I successfully covered everything from HDMI cables to headsets (my dictation headset has a much thicker cable than most headphones or earbuds), cables for my phone, tablet, kindle, keyboard, camera battery charger…and a handful of others.


Select the cord and embroidery thread you are going to use. Hold an a half to 1 inch of the floss down along the edge of the cord so you can secure the end. Start wrapping tightly, being sure to cover the floss end as you work. Don’t tie knots.

When you switch colors you want to be careful that you are wrapping the new color as close as possible to the old color. I like to alternate 2 colors, carrying the strand of embroidery floss I am not working with next to my cord. You want as few ends as possible that can come unravelled.

I limited the number of colors I had going at any time to 2- enough to make for lots of short fun stripes, but any more strands effected the thickness of the cord, making some sections appear to bulge.

Binder clips and twisty ties help hold the cord in place while working…

…and are also useful when you have to set your work down.

When you are nearing the end be especially vigilant that you are wrapping tightly- you will tug on the ends of the wrapped cords the most, and you want to be sure the embroidery floss is wound tight enough that tugging won’t cause it to unravel. When you reach the end cut a the floss 6-8 inches and thread it on to the needle. Going under just a few strands at a time, weave the floss under the wound floss for at least a half inch- one inch is better. Don’t knot the threads- you want the end to be as seamless as possible. If you are worried about it unraveling, a few drops of glue will help hold it in place.

Filed Under: Tutorials

Metallic Pink

metallic pink knit hat (3)

Knit in a metallic silver yarn with alternating stripes of hot pink and dark gray wools. I was trying to use up the last bit of some very neon pink yarn (Silky Merino in 402 Hot Pink by Malabrigo).

metallic pink knit hat (1)

The dark grey is a plain wool yarn, which helps add some stretch to the ribbed hem and counteract the very much not stretchy nature of the metallic yarn. The silver metallic yarn is a rather odd braided/i cord style acrylic novelty yarn with a strand of shiny silver running through it. Not my usual choice of yarn- but very fun with the hot pink stripes.

metallic pink knit hat (2)

metallic pink knit hat (4)

Filed Under: Haturday - Knit Hats

  • « Go to Previous Page
  • Go to page 1
  • Interim pages omitted …
  • Go to page 5
  • Go to page 6
  • Go to page 7
  • Go to page 8
  • Go to page 9
  • Interim pages omitted …
  • Go to page 14
  • Go to Next Page »

Footer

  • About
  • Knitting Patterns
  • Tech Editing
  • Free Patterns
  • Blog
Midnightsky Fibers on Ravelry Midnightsky Fibers on Twitter Midnightsky Fibers on Instagram
PS: you get free knitting patterns when you sign up!