• Skip to main content
  • Skip to footer

Midnightsky Fibers

Patterns for Your Knitting Adventures

  • Hats
  • Mittens & Wrist Warmers
  • Shawls & Scarves
  • All Knitting Patterns
    • Baby
    • Mittens & Wrist Warmers
    • Hats
    • Home & Accessories
    • Shawls & Scarves
    • Sweaters & Vests

Tutorials

Library

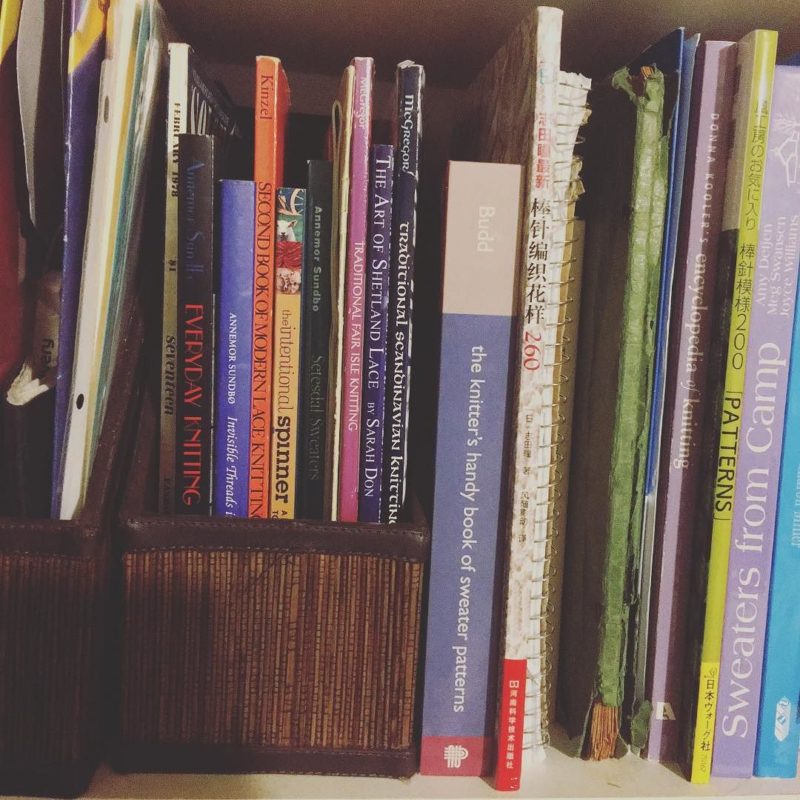
I keep a fairly small library of knitting books, with mostly history and stitch libraries. I find that my local library has most of the other knitting and spinning books I like to look at occasionally. The below are affiliate links (and I may get a small amount if you buy through them), but your local yarn store and library probably have the classics. You can also view all the books in one place here: knitting library.


History Books

I love books that explain the history of textiles, and there are some really beautiful ones out. I don’t have much space to store books, but I hang on to my history ones for the inspiration.

A History of Hand Knitting – as Clara points out in a review on Knitters Review, this book isn’t light reading. Best if you are interested in the history of knitting and aren’t looking for patterns.

Traditional Scandinavian Knitting – good for both a bit of history and traditional scandinavian charts. (If you like colorwork, Traditional Fair Isle Knitting and SELBUVOTTER are also good.)

Everyday Knitting – a great book for the history of what people wore based on what the author found sorting through rag piles. Annemor Sundbø also wrote Setesdal Sweaters and Invisible Threads which also live in my library (it was dangerous working in a yarn store with a great book selection!).   

Poems of Color – 3 or 4 colors per row? Check. Not for the beginning knitter, but the patterns are pretty and the history of Bohus Workshop interesting.


Reference Books

Sweater Design in Plain English – I have an old version of this book from the 1990’s, good if you want to design your own sweaters.

The Knitter’s Handy Book of Sweater Patterns – a great jumping off point with basic patterns for different styles of sweaters. The series also has a book for basic patterns and top down sweaters.

Knitting Languages – now that google translate exists this book is maybe not as necessary, but I hold on to it anyways.


Stitch Dictionaries

Norah Gaughan’s Knitted Cable Sourcebook – My favorite knitting book that has come out in the last few years (though it may be tied with the stitch dictionary below), the cables are fantastic.

Heirloom Knitting – this book may be hard to find (and currently copies are expensive!) but has a great collection of Shetland lace charted patterns. The Art of Shetland Lace also has lace patterns and is more readily available (though much smaller).

Barbara Walker Knitting Treasuries – worth getting at least the first one (there are 4) if you find yourself subbing in your own stitch patterns.


Japanese Stitch Dictionaries

Most of these pattern books are charted and have numbers to the side to indicate the pattern repeats. Somewhere in the book there will be basic illustrations explaining what each symbol means and how it is worked. This Knitty article is helpful.

Clear & Simple Japanese Knitting Symbols Translated – this is one of the less expensive Japanese stitch pattern books. A good book to get to see if you like this style of stitch library.

Treasury of 260 Couture Knitting Pattern –  (aka Knitting Patterns Book 260) currently my favorite stitch dictionary.

Treasury of Couture Patterns 250 – interesting combinations of lace and cables.

Knitting Patterns 500 – as it says, 500 stitch patterns.

Favorite Knitting 200 Pattern – has a fair number of relatively intricate patterns.

1000 Knitting Patterns Book – a bunch of the patterns are actually crochet, but there is a huge variety of options.


Pattern Books

Elizabeth Zimmermann’s Knitter’s Almanac – includes my favorite Pi Shawl, which also makes for a great baby blanket.

Elizabeth Zimmermann’s Knitting Workshop – has all the classic EZ patterns: Baby Surprise Jacket, Tomten, the Pi Shawl, etc. This is my favorite EZ book. If you are a newer knitter, a copy of Knitting Without Tears is also a great addition so you have a bunch of knitting tricks all in one place. While you are at it, Knitting Around is another EZ favorite for the bog jacket, fair isle pullover, and mitered mittens.

PS- If your library doesn’t have the EZ books, they are very much worth getting at least one of two of them. You can often get used copies at Amazon starting at $3-4. I find my library has all her most popular books though! Take a look at the Ravelry page for EZ and see what patterns are included. For example, the popular (and one of my fave baby gifts to make, tied with baby booties) Baby Surprise Jacket is in both Knitting Workshop and The Opinionated Knitter.

Knitting Lace Triangles – Classic Evelyn Clark lace triangles in mix and match patterns. Not for the beginning lace knitter, but not difficult.

Sweaters from Camp – A book from my yarn store days (and a reminder some days of how much fun it would still be to work in an LYS). If you like knitting colorwork sweaters, this is a great resource.

Second Book of Modern Lace Knitting – I’m not sure what happened to my copy of the first book, but if you like knitting lace in the round these are fun books. I like using worsted weight yarn and big needles with these to make blankets and giant cozy shawls.

Folk Shawls – Out of print, but if you don’t want to knit shawls just in laceweight this is a fun book.

Latvian Mittens – I went through a huge colorwork mitten knitting phase awhile back (pre pinterest), and this was a favorite for browsing through for design ideas.


Spinning/Weaving Books

The Intentional Spinner – I have the book version, but now that there is a kindle version available I may have to switch over to that. If you prefer learning from a book instead of videos, this is a classic spinning book.

Foundations of Weaving – a holdover from having my last loom, I didn’t keep much in the way of “how to weave” books after getting rid of my last loom (hopefully temporarily, I hope to have a more space efficient loom in the future!).

Filed Under: Tutorials, Uncategorized

Knitting Tools

First, a caveat: 95% of the knitting I have been doing the last couple years has been stash busting. I won’t say I have been cold-sheeping, since that would be a big fat lie (let’s not discuss how much I spent on non-business yarn this month!), but my yarn and fiber stash has gone way down. And most of that knitting happens on my size 4 needles and a 16” cord from my Addi Click set. I’m a loose knitter, so that is closer to a size 6 needle for most people.  No double pointed needles, I just magic loop it for a few rounds. I’ve also drastically streamlined my tools in the last few years. I went from havings vases full of straight needles I never used and tangled piles of “meh” circular needles down to a couple drawers full of supplies (ok, and several shelves for spinning and weaving tools, tubs on yarn, etc).

PS- This post contains affiliate links, which may give me a small commission when you buy through them. It helps keep me stocked up on yarn. If you have a local yarn shop near you, look for these items there!  You can also see the list of knitting tools all in one place here: knitting tools.

Needles

Addi Click – I got these when I was still working in a yarn store, and they have been going strong for 6+ years. I bought extras of my favorite size needles and extra cords. I have a bunch of the 16” cords since my set doesn’t come with it and I knit mostly hats. I can magic loop with the 16” cords and the regular needle tips, but it is hard to do with the long lace tips.

I usually use Addi Rockets when I need a needle size smaller than what my interchangeable set has. When I travel I often switch to a wood circular needle and I always use wood double pointed needles (which I prefer anyways to metal since they feel warmer, despite breaking them occasionally). I keep all my circular and dpns in a needle case, though I have yet to find one in a pattern I am totally in love with. At some point I will probably switch back to just a zipped pouch for all my circs and a separate case for my dpns since my circs all tend to end up in the bottom of the tool drawer instead of in the case anyways.

Tools

Pom Pom Makers: My favorite are the Clover Pom Pom Makers which have a deeper channel cut cutting the yarn. I mostly use the large sizes (I like big pom poms!), though I have all but the largest size. I find the extra small size Clover ones to be fiddly and often not “puffy” enough. I also tried the plastic disk style makers (not this set, but look like this) and found them difficult to cut neatly. When I have extra yarn I make a few pom poms to keep on hand- they are often just the thing I need to top a hat!

Tapestry Needles: I always keep one of the bent metal tapestry needles in my wallet for weaving in ends on the go. They work for all but the absolutely bulkiest of yarn, and I have yet to break one (I tend to lose them first!).

Stitch Markers: most of the LYS (local yarn stores) near me carry my favorite locking stitch markers. I just wish they came in more colors! I like “french bulb pins” which are thin metal pins shaped like a gourd. I buy these 100 or 200 at a time on Amazon or eBay since I also use them to attach tag to things I am donating.

Scissors: I use a pair of nail clippers to cut most yarn ends. They live in my wallet along with a tapestry needle and extra stitch markers! When I need to cut lots of ends or when I am making pom poms I use a pair of scissors I keep just for crafting (currently these scissors, which are pretty small but very, very sharp).

I also find a seam ripper to be very helpful, especially when I unravel sweaters for the yarn. I don’t usually skein- I just wind directly on the ball winder and start knitting from it!

Wool Wash: I don’t use a specific wool wash. I use a dash of whatever castile soap I have on hand, which is also what I use to handwash delicate clothes.

Storing Yarn: I store yarn in large storage ziplocks or the smaller vacuum seal bags. I find it hard to tell what I have with the really big bags, especially single skeins and small lots of yarn. Partial skeins are stored combined with others in a ziplock of the same yarn type. Most smaller leftover bits live in a large glass storage jar until I have enough of the same type to make a stripey hat or another small project. Any yarn that I thrift or buy from an individual gets frozen for a couple cycles in my freezer (yarns from LYS too when I have space) since I am a bit paranoid about moths and bugs.

I don’t keep all my pattern samples I make, but I do keep most of them. Once they are photographed and the pattern published I store items in sealed bags in the same area I keep my “secret” stash of handknit items I keep on hand for gifting.

Blocking

I use 2 sets foam mats to block knitting on (currently these ones since I wanted a solid color). I used the regular straight blocking wires for years, but switched recently to flexible ones from Inspinknity and have been kicking myself for waiting so long. Unlike the straight ones, you don’t have to fight with kinked wires or try and store cords that are intent going ten different directions. Get extra T pins. You can never have enough, and they seem to mysteriously disappear.

Ball Winders

I recently got a larger ball winder. My old smaller one worked fine for most skeins of yarn, but wasn’t big enough for skeins I am making on my giant electric spinning wheel bobbins. I almost got one of the NNN ball winders (someday I want one of the electric ones!), but for now price and storage space won out. My search for the perfect swift that also works as a yarn winder continues, but in the meantime I use a wood one that clamps to my coffee table. People laugh, but my rule is that my furniture needs to be multi use and work well for my craft needs. So my side tables have tops I can clamp a wall winder or bobbin winder to, my coffee table is actually a bench, and and nightstand drawers actually hold my knitting tools.

Filed Under: Tutorials

Unravelling Cashmere Sweaters

Unravelling sweaters is a great way to get ahold of yarn that is expensive or hard to find new. My absolute favorite yarn to recycle from sweaters is cashmere. There are a few things that make unravelling a cashmere sweater a bit trickier than other sweaters, but it is still very much worth the time it takes.

Choosing Sweaters
Cashmere sweater that are good for unravelling can take a bit of a search. You want a sweater that has clear stitch definition, making it much more likely that it has multiple strands of yarn. The more strands, the easier (and faster!) it is going to be to unravel, with less chance of breakage. Avoid sweaters that are at all felted, they will be almost impossible to unravel. On the other hand, small holes and stains can be worked around (just unravel and discard that section of yarn).

Great | Good | Not Ideal

The sweater on the left is great for unravelling- loosely knit, not felted, and knit from multiple strands. The middle sweater is ok for unravelling (it is the sweater in the other pictures here)- it was made up of 2 strands of cashmere, the thinnest I will go.  The bright sweater on the right is not great for unravelling- it has minimal stitch definition and appears to be made up of just one strand of cashmere, which would likely lead to quite a bit of breakage as I wound the yarn.

  • Pullovers are often easier to take apart and wind than cardigans- the fewer pieces, the less chance of cutting the wrong yarn.
  • If you have a choice of sweaters, go for the biggest sweaters you can find.
  • I can usually find sweaters to unravel for $5 (or less) at the thrift stores near me. They generally have small imperfections or are very dated styles- not a problem since I am unravelling them anyways.
cashmere- finding the ends of the yarn
The ends are easy to spot on this sweater- chain stitches that make it easy to spot where to cut the seam.

Finding the Ends
Depending on how the sweater is joined, some seams will be easier to take apart than others.New to unravelling sweaters? There are lots of tutorials out there, but cashmere comes with a caveat- don’t cut the seams with abandon! Go slow, and use the sharpest/smallest scissors you have. Cashmere strands are thin enough you will end up cutting more than just the seam thread if you aren’t careful, and you want to avoid having to tie too many knots.

cashmere - unravelling the edgings
Unravelling the button band (make sure to save the buttons- these were shell!)

If you find that the seam thread doesn’t want to “unzip” try working from the other end of the seam- often, the hardest (and most time consuming!) part is finagling the seam thread to get it to unzip. Once you have found the right section of yarn, it will often unzip quickly, like this (video link). The yarn joining the seam will usually be either a strand of the same cashmere as the sweater or a matching thread. Cross your fingers it is a matching thread- it is usually stronger, making it easier to tug on to unravel the sweater.

cashmere- winding in to balls (2)

Winding
The key to winding the yarn is to go slow- tugging or the yarn getting stuck can break the delicate cashmere. Wind each section of yarn by hand or on to a ball winder, making a new ball for each new strand of yarn. Don’t try and unravel and wind multiple strands at once- it is a recipe for tension disaster. Once all of the yarn is wound in to balls you can skein for dying, wind multiple strands together, or spin and ply to create a thicker yarn. I don’t usually bother to skein and wash the yarn first for quick projects- this leaves my yarn with a bit of uneven texture once blocked. If you are planning on something with a smooth surface (i.e. a stockinette project) you would want to block the skeins first.

cashmere- winding in balls
A sweater’s worth of yarn, ready to be wound together to make a thicker yarn

When I wind multiple strands together, I try and stagger the size of each ball so that the knots I tie when joining new balls are spaced out.

Making
I unravel a sweater or two at a time and use the yarn as I go along, stockpiling some of it if I have plans for a larger project. My absolute favorite thing to make with recycled cashmere yarn is blankets. This requires a LOT of cashmere, so in the meantime I use the yarn to make smaller projects:

  • Hats, and the inside hem of hats (I use a sock weight cashmere for most inside hems to minimize bulk).
  • Wrist warmers
  • Baby booties

Bits and Bobs

  • Most of the cashmere sweaters I unravel have between 2 and 4 strands of yarn. If you are planning a big project, unravel all of the sweaters first, then decide how many strands you are going to knit with – you can separate and recombine the strands to get the thickness you want, but it is a pain.
  • If you plan of dyeing your yarn, dye is after the sweater is unravelled and wound in skeins; otherwise you risk felting the yarn and not being able to unravel it!
  • The short bits of yarn you have leftover can be carded in to funky art yarn batts if you spin. Otherwise, for cashmere and wool yarns I cut them up in to smaller pieces and put them in my compost or use them in stuffing.
  • Watch out for the edgings on your sweaters- sometimes the cuffs and button bands are made from a more tightly plied yarn or have a different number of strands.
  • For knitting bulky yarn weight projects, I prefer to spin and ply the multiple strands of cashmere together- this takes quite awhile to do, but makes it much easier to knit with.

Filed Under: Tutorials

Kimono Booties

Kimono Booties midnightskyfibers.com

These cute booties may not be very practical (I am not sure how well they would stay on tiny feet), but they sure are cute! They take a teeny tiny bit of yarn- a ball a bit larger than a walnut for the dk version, and slightly less for the sock/light dk weight yarn.  Based on Chaussons Mignons (scroll to the bottom for the english version), with some big changes. Instead of casting on a few stitches and knitting rows and rows with just a few stitches to form a T and having to sew up the sides, I knit mine in one piece, with picked up stitches to avoid seaming.  I also don’t like knitting back and forth across just a few stitches, so I knit the sole sideways instead, which also made picking up stitches easier.

Note: the changes I made really require you to use a circular needle or several dpns, since picking up stitches around the heel and the first few rows after won’t work well if knit straight across, the booties are simply too small.  If you want a truly invisible edge, use a provisional cast on (I didn’t bother and the seam is barely noticeable). If you only have straight needles handy, I recommend what several of the commenters did- cast on and knit from the top of the “T” down.

Kimono Booties midnightskyfibers.com

DK yarn and size 4 needles
Knit in 1 piece, so the only seaming is at the toe.

Cast on 14 stitches.
K 16 rows.
Pick up and knit 8 stitches (1 for each ridge).
Pick up and knit 14 stitches across cast on. [36 stitches total]
Knit 16 rows.
Bind off loosely.
Sew toe seam at front.

Kimono Booties midnightskyfibers.com

Sock or light DK yarn- size 2 needles.
These are tiny, maybe suitable for a newborn.
Cast on 12 stitches.
K 12 rows.
Pick up and knit 6 stitches (1 for each ridge).
Pick up and knit 12 stitches across cast on. [30 stitches]
Knit 12 rows.
Bind off loosely.
Sew toe seam at front.


PS- this is how the stitches are picked up from the base:

kimono-booties


Filed Under: Tutorials

Midnight Express Hat Top Tutorial

wool, mohair, and silk knit beanie

Midnight Express Hat Top

This is the hat top you make when you realize you have knit around and around (and around) and are about to run out of yarn. Or when you want a hat with a scrunched up top typical of many slouchy hats without having to break yarn and pull through 20+ stitches (the downside of which is often a hole that widens as the hat is worn).

Set Up: Finish knitting the body of you hat. You want the hat to be as long as you need for it to fit your head- or a bit more if you want it to be slouchy, since the decreases add only a couple rounds. I try the hat on and scrunch it on top of my head- if I can scrunch the top all the way closed, I am ready to start decreasing.

midnight express hat (3)

To work the top: Knit 2 stitches together around and around, every round. No need to place a marker, just work around until you are out of stitches. Try and keep an even tension as you do this (especially at the edges of needles), to avoid stretching out the decreases.

  • Flat top: Stop when you have 6-8 stitches left if you want a “flat” top without a slight point at the top, break yarn, pull through remaining stitches. This is best if you need a flat top for attaching a pom pom to.
  • Pointy tip top: Knit 2 together around until you have 2 stitches left. Pull the last stitch over the first, break yarn, pull through last stitch. This forms a teeny tiny pointy tip at the top.
midnight express hat rapid decrease
I made this picture a bit washed out so you can see the details a bit better- check out the halo from the mohair!

Good for:

  • Stretchy, slouchy hats with a casual look.
  • Stockinette, reverse stockinette stitch, or very simple patterns that won’t be distorted by the rapid decreasing.
  • DK, worsted weight, or larger yarns where all the stitches can be decreased in just a few rounds.
  • Wool and wool blend yarns with lots of stretch- they won’t look as distorted by the rapid decreasing.
  • When you want to finish a hat quickly- no stitch marker or remembering how many rounds to knit between decrease rounds.

Not great for:

  • Sock weight or smaller yarns- anything that takes more than a few rounds tends to look sloppy and stretched out. Better to add a few knit rounds between decrease rounds.
  • Inelastic yarns- yarns that are mostly cotton, silky, or other fibers without much stretch won’t look at neat at the top.

midnight express hat (5)

Variation:

I usually work a variation of this top, with several knit rounds between each round of decreases. This still has a scrunched top, but stitches do not look pulled out, and it is easier to continue decreasing in a particular stitch pattern.

beanie with ribbing

I knit this hat in a dark gray wool with a strand of mohair and silk held along for a bit of fuzz and shine. I sized up a needle from my usual gauge to really let the mohair shine through. A couple inches of 1×1 ribbing for the brim (being lazy and not switching to a smaller needle, since I didn’t have one with me- notice how it poofs) and straight st st for the body made this a quick and easy knit- which is just what I needed for a weekend project while waiting for fireworks at a festival.

Filed Under: Haturday - Knit Hats, Tutorials

Wrapped Cords: Embroidery Floss Covered Electric Cords

(I  wrapped more or less all of the cords I own. In one day. I wouldn’t recommend doing it all in one day- it hurts your hands to do more than a couple cords at a time!)

Time: 30 minutes – 2 hours+ per cord. Short cords under 2 feet take about a half hour. Longer cords or cords like computer power cords take quite a bit longer since they are harder to wrap due to heavier parts.

Supplies:

  • Several skeins of embroidery floss- leftovers work perfectly, as long as they all have the same number of strands. You will need the equivalent of 2-3 full skeins of floss for most cords. Yarn will also work, but embroidery floss worked best for me since it is all the same thickness.
  • As small a needle as you can find that you can still thread the embroidery floss through the eye
  • Small floss folders or something to wrap the embroidery floss on to- optional, but helpful to prevent tangling
  • Binder clips, twisty ties, or anything else that will help keep the cords from tangling as you work.

Cords:

My favorite ones to wrap are 3-4 foot long USB cables- they take between 30 minutes to an hour to cover. Most headphone cords aren’t suitable- they are too thin to look nice (covering them in knit icord is a much better option- you get a pattern for this when you sign up for my newsletter). I successfully covered everything from HDMI cables to headsets (my dictation headset has a much thicker cable than most headphones or earbuds), cables for my phone, tablet, kindle, keyboard, camera battery charger…and a handful of others.


Select the cord and embroidery thread you are going to use. Hold an a half to 1 inch of the floss down along the edge of the cord so you can secure the end. Start wrapping tightly, being sure to cover the floss end as you work. Don’t tie knots.

When you switch colors you want to be careful that you are wrapping the new color as close as possible to the old color. I like to alternate 2 colors, carrying the strand of embroidery floss I am not working with next to my cord. You want as few ends as possible that can come unravelled.

I limited the number of colors I had going at any time to 2- enough to make for lots of short fun stripes, but any more strands effected the thickness of the cord, making some sections appear to bulge.

Binder clips and twisty ties help hold the cord in place while working…

…and are also useful when you have to set your work down.

When you are nearing the end be especially vigilant that you are wrapping tightly- you will tug on the ends of the wrapped cords the most, and you want to be sure the embroidery floss is wound tight enough that tugging won’t cause it to unravel. When you reach the end cut a the floss 6-8 inches and thread it on to the needle. Going under just a few strands at a time, weave the floss under the wound floss for at least a half inch- one inch is better. Don’t knot the threads- you want the end to be as seamless as possible. If you are worried about it unraveling, a few drops of glue will help hold it in place.

Filed Under: Tutorials

Footer

  • About
  • Knitting Patterns
  • Tech Editing
  • Free Patterns
  • Blog
Midnightsky Fibers on Ravelry Midnightsky Fibers on Twitter Midnightsky Fibers on Instagram
PS: you get free knitting patterns when you sign up!